Photographing Artwork with Your iPhone
One of the things we love about our members is that they come from all levels of the art world. We have long term professionals and educators. We have people just getting started and people returning after many years working elsewhere. And our goal is to help all of you.
Good photos of your work is the number one priority in the art biz. Anyone will tell you that. But I’m not going to tell you that you have to hire a professional photographer or buy an expensive camera. Though that is awesome if you want to!
As the person who loads your images into your portfolio pages and the online shop, I have to say it’s painful to see beautiful work not represented in it’s best “light”.
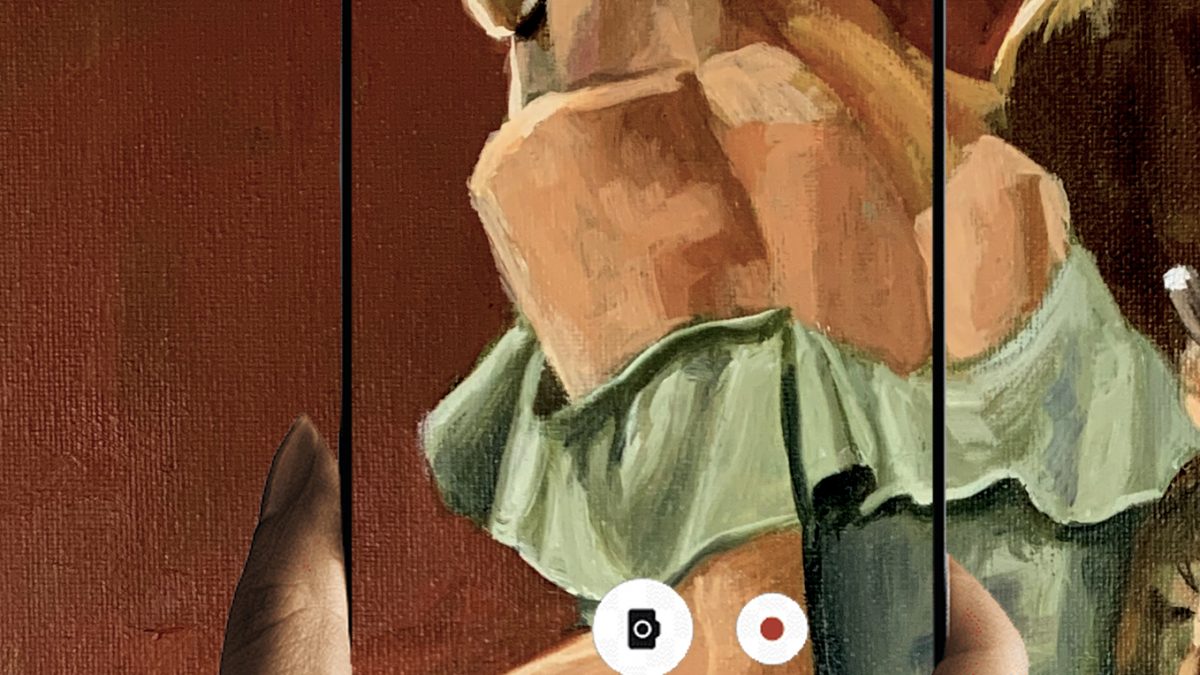
I’m not a professional photographer but I’ve been doing this long enough to know a few things. So today I want to talk to the people who take photos of their work themselves WITH their iphones.
Using your iphone is ok. My favorite professional photographer may disagree but I’m telling you, it’s ok. For now. When you start applying to Gagosian Gallery, probably not.
And with some easy tips you can take very nice photos with your phone that will look great on your Evanston Made Portfolio page or the Art Shop.
Tip #1:
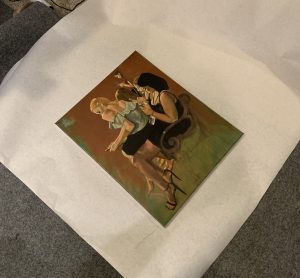
Take photos of your work BEFORE it goes under glass. Taking good quality photos of work under glass can be a challenge for even a seasoned professional. But luckily, as the artist, you can take the photo before you frame it! What I used to do was buy large sheets of white foam core. Then I would lay it on the floor, lay the art in the middle and take the photo (we’ll talk about lighting later). If it was a work on paper, I would thumbtack the corners into the foamcore and then I could take the photo with the foamcore leaning upright.
Tip #2:
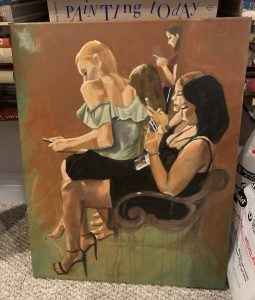
Take the time to get the angles right. We see a lot of photos with work looking like a trapezoid. Like a crazy trapezoid. Not just a little. Sometimes it even looks like the artist just took a photo from the side. Try your hardest to center your work in the viewer. It’s not easy to get perfect but the closer you get to correct angles the less you’ll have to crop.
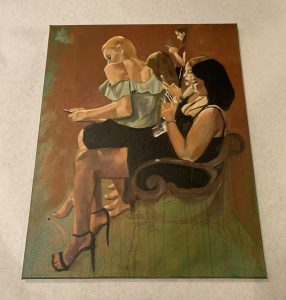
Which leads me to Tip #3:
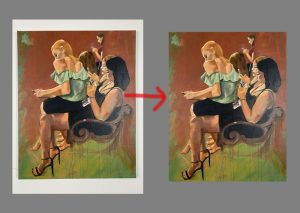
CROP YOUR ART! There is no excuse nowadays with the ease of our smart phones to leave messy edges around your work. Unless there is a legitimate reason you need to see the sides around your work, please crop until you only see artwork! Once you have a good clean cropped image you can also have images that show the sides of the work or how it looks hanging or how it looks framed but you must have one clean image.
Tip #4:
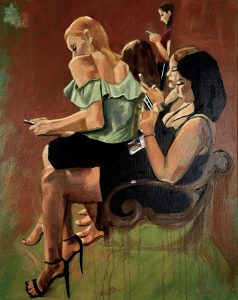
Use you photo tools to correct lighting. You do not need a degree in photoshop anymore to adjust the light on your work. Use your brighten, contrast and other buttons to adjust the art to how YOU see it. Don’t just assume the camera is correct. Experiment. Amanda Evanston made a very good point at our Instagram workshop that we all should be lightening our images a bit before we post on IG. And I hadn’t thought about that until she said but she’s right. I would struggle to get the right lighting balance on my images and then after posting them on IG would be frustrated that they looked a bit dark. So now before I post on IG I overcorrect the brightness a bit!
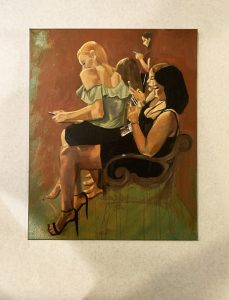
On the photo below playing with the Exposure button darkened the image but also cleaned up some of the glare that was there before. So you try to find a balance.
Tip #5:
Find a method for getting decent lighting. Decent lighting means no shadows. No glare. I used to wait for overcast days and then run outside with my work to get good images. That’s still a very sound method. And thankfully Chicago has plenty of overcast days.
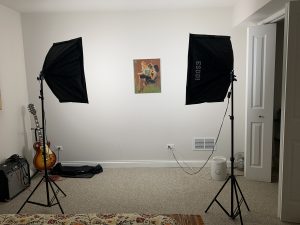
I have now invested in an inexpensive lighting kit from Amazon. We have a spare bedroom and I’ve put a couple nails in the wall. I leave the lights up all the time but they’re very easy to take down if you can’t leave them up. It’s tricky to find where the lights should point to avoid glare but I’m experimenting and getting better. And now that my light studio is open 24/7 I also take work in progress photos after every painting session. Very good for social media! And also really fun to see the development of the work.
Even inside the house with no pro lighting can work if you can find a space where no shadows are cast. It often involves turning off lights and being by a window. Search your house and I’m sure you’ll find a spot where at least small work can be shot.
Here’s an article on The Artist Market blog that has some additional useful information.
Thanks for reading.
Related Posts
Categories
- Alternative Art Space (37)
- Art Exhibit (1)
- Art Festival (5)
- Art in Business (1)
- Art Opening (17)
- Artist Studio Tour (5)
- Artist Talk (16)
- Auction (3)
- BIPOC (5)
- Black History Month (3)
- Call for Art (1)
- Community Event (1)
- Creative Development (7)
- Evanston Art Center (4)
- Evanston Community Event (30)
- Evanston Made Event (64)
- Exhibition Review (1)
- First Saturday (11)
- FREE event (1)
- Fundraiser (16)
- Gallery Opening (9)
- Holiday Shopping (4)
- IGTV (1)
- Installation (5)
- Internship (1)
- Interview (7)
- Maker's Market (7)
- Member Close-Up (3)
- Members Event (14)
- Members Mixer (4)
- Mentorship (1)
- Mural (1)
- Partners (9)
- Plein Air (11)
- Pop Up Shop (18)
- Uncategorized (16)
- Volunteer (2)
Tags
Archives
Categories
- Alternative Art Space
- Art Exhibit
- Art Festival
- Art in Business
- Art Opening
- Artist Studio Tour
- Artist Talk
- Auction
- BIPOC
- Black History Month
- Call for Art
- Community Event
- Creative Development
- Evanston Art Center
- Evanston Community Event
- Evanston Made Event
- Exhibition Review
- First Saturday
- FREE event
- Fundraiser
- Gallery Opening
- Holiday Shopping
- IGTV
- Installation
- Internship
- Interview
- Maker's Market
- Member Close-Up
- Members Event
- Members Mixer
- Mentorship
- Mural
- Partners
- Plein Air
- Pop Up Shop
- Uncategorized
- Volunteer

